








How to mix nail polish colors so your at-home mani looks like you sat in a salon chair.
I learned this after an $18 salon mani turned into a muddy brown by day three. This guide shows the specific steps, $20 to $60 starter buys, and the exact products I reach for when I want a custom shade that photographs well and lasts.
I lean clean-tonal vibes—think creamy nudes or warm mauves. This suits warm and neutral undertones and anyone who prefers a polished, wearable look.
Grand View Research projects the global nail polish market will reach about $14.6 billion by 2030, which I take to mean people love custom nails and you can get that look at home without breaking the bank.
1. Mix Your Base: Prep and Color Plan


Start by removing old polish and resetting the nail surface. I always use a clean acetone wipe and a glass file to smooth the edge; it gives polish something even to cling to.
Product picks I use: Acetone nail polish remover 16 oz around $6 to $12 and Strengthening base coat clear approx $8 to $16.
The visual principle is adhesion before color. A thin, even base prevents staining and helps your custom mix read true under different lights.
Ugly truth: skipping prep makes even perfect color look streaky. Do the tiny steps now and you avoid redoing nails in two days.
2. Build the Shade: Mixing Techniques That Actually Work


Decide if you want a creme, sheer, or metallic finish. I sketch the target shade on a swatch sticker, then mix tiny amounts on a palette.
Tools I use: Nail polish mixing palette, Nail polish thinner 10 ml, and Mini nail mixing jars 5ml.
Color theory tip: add the warmer tone when a polish looks flat in daylight. A drop of warm caramel or coral warms a dusty rose without looking orange.
Mix by adding one drop at a time. Test on a tip, let it dry, then tweak. Most people overmix or pour straight from bottles and get sludge. Do small tests and label jars.
3. Application Tricks: Layers, Sheers, and Faux Gel Finish
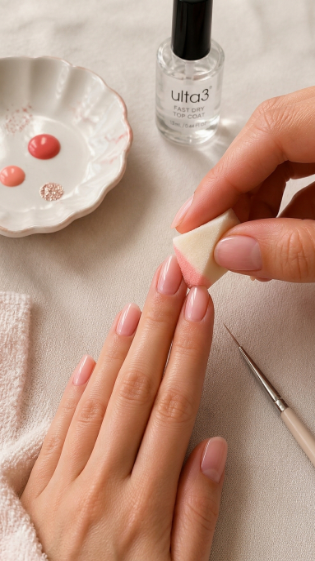

The salon look comes from thin, controlled layers. If you want depth, layer a sheer over a creme rather than thicker single coats.
My go-to tools: Makeup sponge wedge pack, Striping brush nail art set, and Quick dry top coat fast drying.
The visual rule is translucence plus sheen. A sheer layer softens a bold pigment and keeps edges clean. Use a sponge for gradients, a striping brush for thin lines, and one fast-drying top coat between layers to avoid bubbling.
Ugly truth: thick coats chip fast. Thin coats with one careful seal at the free edge last longer.
4. Seal and Refine: Edges, Gloss, and Longevity
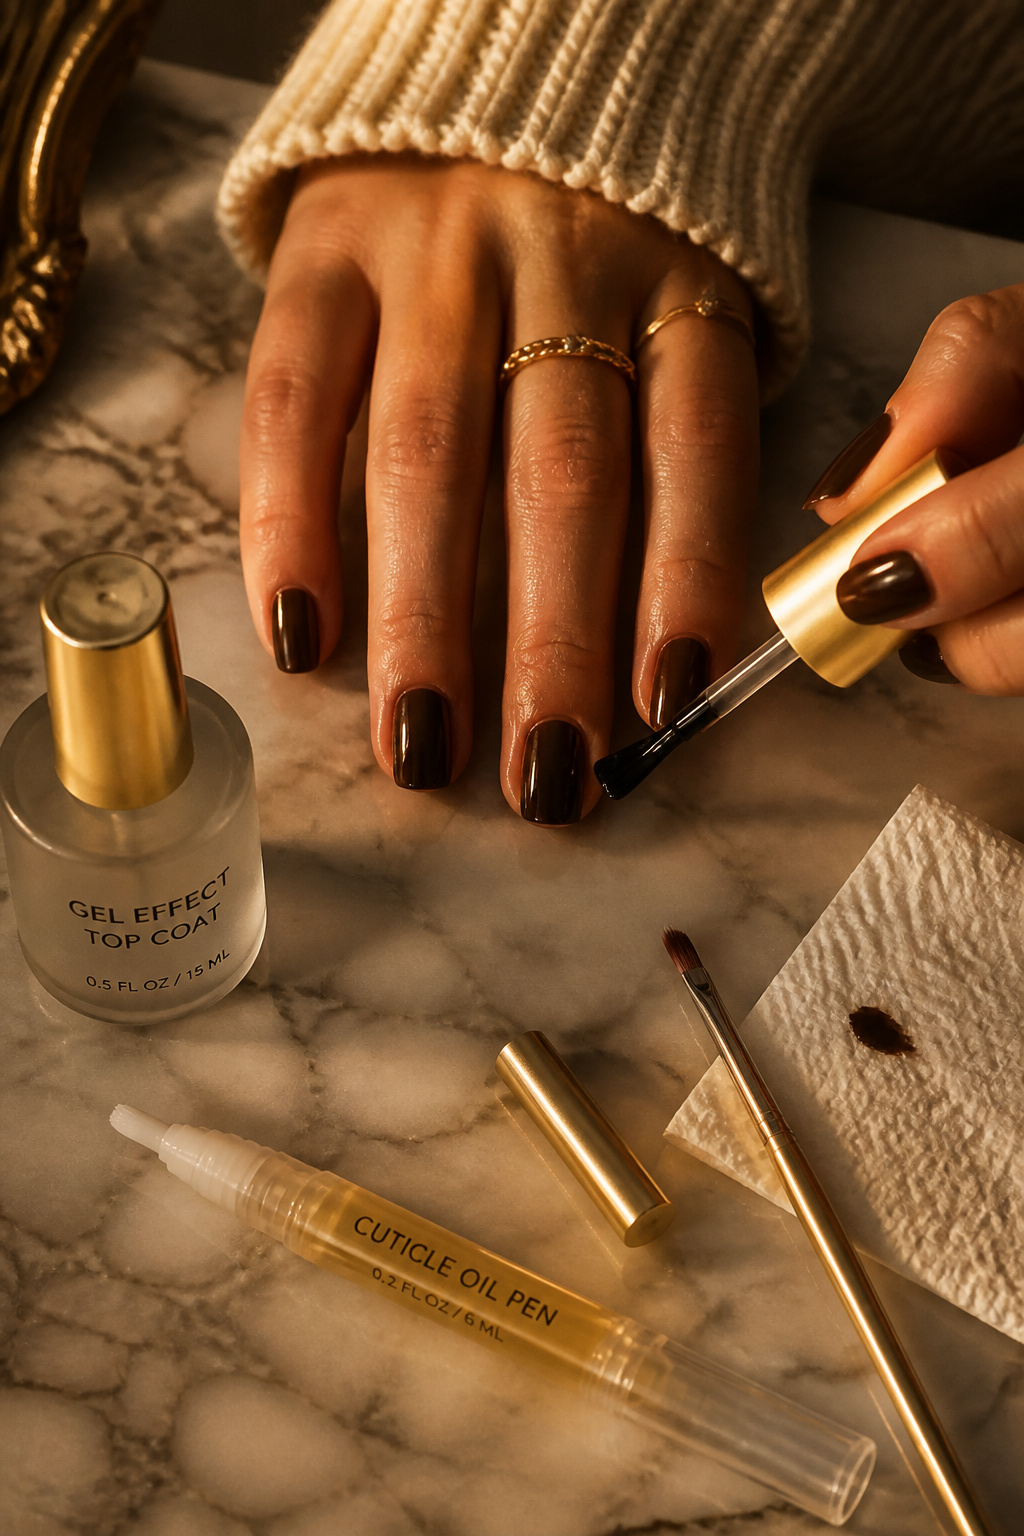

Finish by capping the free edge and wiping any skin polish with an acetone brush. This is what makes a DIY mani look salon-done.
I use Gel effect top coat 0.5 oz around $10 to $18 and Cuticle oil pen 0.34 oz approx $5 to $12.
Seal the tip, dry under a fan or a quick-dry lamp, then hydrate cuticles. The visual payoff is depth and glass-like shine that photographs evenly.
Ugly truth: skipping edge sealing is why your tips peel. Run the brush horizontally across the nail tip once after the main swipe.
Common Styling Mistakes to Avoid
Mistake: Mixing full bottles together the first time
Why it doesn’t work: You can create too much product and a color that oxidizes unpredictably.
Do this instead: Mix tiny amounts on a nail polish mixing palette for testing.
Mistake: Using polish straight out of cold storage
Why it doesn’t work: Cold polish drags and creates streaks.
Do this instead: Warm the bottle in your hands for a minute or dip in warm water and use a nail polish thinner 10 ml.
Mistake: Applying too many thick coats for opacity
Why it doesn’t work: Thick layers peel and look bumpy.
Do this instead: Layer sheers over a base color and finish with Quick dry top coat fast drying.
What You’ll Need for This Look
Face & Base Essentials
Strengthening base coat clear around $8 to $16
Acetone nail polish remover 16 oz around $6 to $12
Cuticle oil pen 0.34 oz approx $5 to $12
Eyes, Brows & Lips
Tinted lip oil clear about $8 to $18
Cream blush stick warm peach approx $10 to $22
Lengthening mascara black around $6 to $20
Clothing Staples
Silk blouse cream size medium approx $30 to $90
Straight leg high waist dark wash jeans around $30 to $120
Shoes, Bags & Jewelry
Leather loafers tan women’s approx $40 to $150
Leather tote bag tan large around $60 to $220
Gold hoop earrings 20mm approx $8 to $40
Budget Swaps
Neutral nail polish set 6 pack around $12 to $30 (drugstore alternative)
Drugstore nail polish 10 pack approx $10 to $25
Shopping Guide for This Look
Buy during beauty sales: Stock up on polish sets during Ulta or Amazon Prime Day for neutral collections like Neutral nail polish set 6 pack around $12 to $30.
Thrift and refresh: Scour thrift stores for glass polish bottles to decant into, then sanitize with Acetone nail polish remover 16 oz about $6 to $12.
2025 trend pick: Tonal nudes and gel-look finishes are trending; try a Gel effect top coat 0.5 oz approx $10 to $18.
Splurge vs save: Splurge on a reliable top coat, save on color with neutral polish multipacks like Neutral nail polish set 6 pack around $12 to $30.
Conclusion
Start with one tweak: mix a drop of a warm cream into a sheer rose to see how it brightens skin tone under daylight.
The real rule is small tests. One drop, one swatch, one seal and you can build a custom polish library you love.
What color mix are you trying first?


