








Transparent nails with glitter are the easiest way I’ve found to make my hands look editorial without trying too hard. I rounded up 20 real-life looks you can copy, most under $25, a few splurges around $50, that catch light every time. These are styles I’ve actually worn to coffee dates, weddings, and on bad manicure days when I needed a quick lift.
These ideas skew clean, glowy, and wearable. Most picks are under $25, with splurges up to $50 for gels and topcoats. They work for minimalists, soft-glam lovers, and anyone who likes a little shine without full-on color. Also, I've noticed transparent finishes and micro-glitters popping up in 2025 trend roundups more than chunky foils.
1. Clear Holographic Micro-Glitter Tips
Style: Clean Girl | Budget: Under $20 | Best For: Short nails, cool tones


A thin line of holo glitter at the tip reads modern and subtle. The trick is to use a clear base, paint a fine stripe, then seal with a glassy topcoat. I bought a clear holographic micro-glitter polish for about $9 to $14 and got three compliments at brunch. Pro tip, press the brush horizontally for an even edge.
Shop this idea:
2. Sheer Pink Base With Iridescent Flakes
Style: Soft Glam | Budget: Under $22 | Best For: Warm undertones


A sheer blush wash under scattered iridescent flakes reads polished and wearable. Apply one sheer coat, pat flakes with a dotting tool, then finish with two coats of clear topcoat. I picked up a jar of flakes for about $6 to $12 and it lasted through two salon-level manicures. Heads up, chunky flakes can snag on fabric if not sealed well.
Shop this idea:
3. Clear Jelly Base With Gold Foil
Style: Old Money Minimal | Budget: Under $25 | Best For: Neutral wardrobes
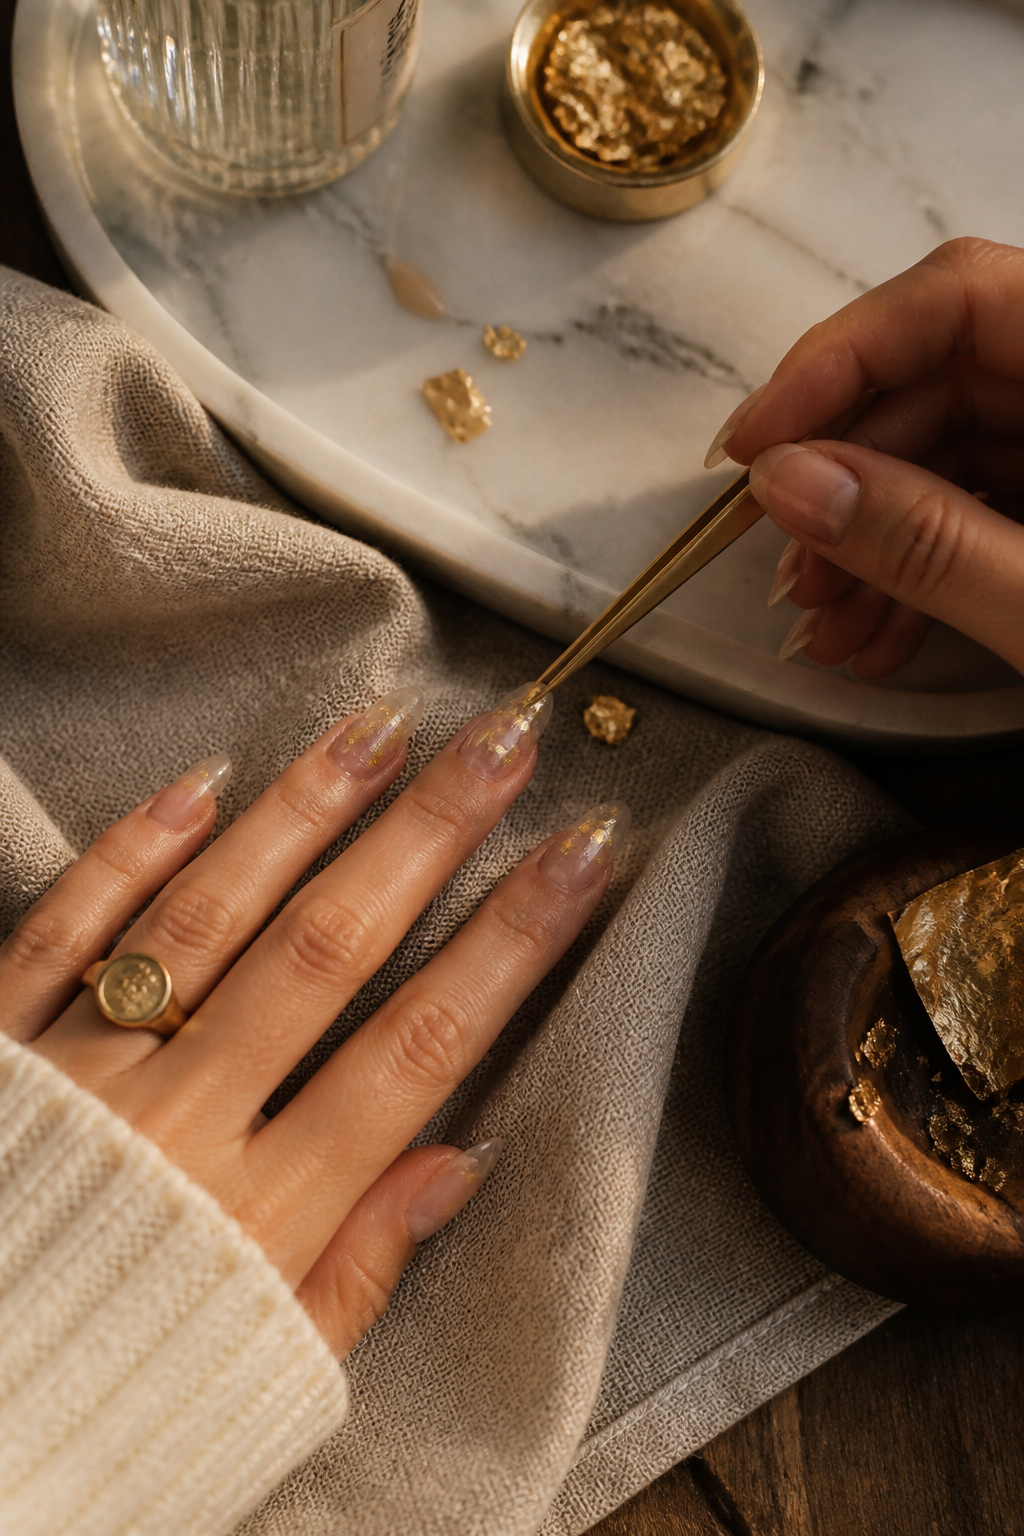

Gold foil on a translucent jelly base reads quietly luxe. Use small foil flakes; press gently and seal with a high-gloss topcoat to avoid lifting. I learned the hard way that thick topcoats prevent foil edges from catching on wool sweaters. Bought a foil starter set for $8 to $18 and it instantly elevated a plain sweater-and-jeans outfit.
Shop this idea:
4. Skinny Glitter French Line
Style: Minimalist | Budget: Under $18 | Best For: Work-safe sparkle


A single skinny streak of micro-glitter along the smile line is the no-fuss way to add shine. Use a striping brush and steady hand, or stamp with a foil guide. I tried a press-on French and it looked fake; the skinny brush is worth the $6 to $10. Worst truth, if you skip sealing you’ll get chips by day three.
Shop this idea:
5. Clear Gel With Confetti Holo Bits
Style: Playful | Budget: $20 to $45 (gel tools optional) | Best For: Party nights


Embedding tiny confetti holo bits in clear gel gives a suspended sparkle that catches every light. You’ll need a basic LED lamp if you want long wear; I spent $28 on a compact lamp and it changed my at-home results. Ugly truth, gel is faster to chip poorly if you skip cuticle cleanup before curing.
Shop this idea:
6. Sheer Coffee Tint With Gold Specks
Style: Warm Neutral | Budget: Under $20 | Best For: Medium to deep skin tones


A sheer coffee tint makes glitter feel grounded and wearable. I dabbed gold specks near the cuticle for a touch that reads expensive. Price anchor, I found a coffee-toned sheer polish for $7 to $12 that I reach for weekly. Real talk, chunky glitter with deep tones can read messy if not precisely placed.
Shop this idea:
7. Clear Ombre With Pearlescent Glitter
Style: Romantic | Budget: Under $20 | Best For: Brides, date nights


A pearly glitter ombre from cuticle to tip softens the look while still reflecting light. Use a sponge to dab glitter upward for a blended gradient. I tried a brush method first and it looked patchy; the sponge evenly distributes fine glitter for $4 to $8. Keep a remover pad handy, pearl glitter can cling to skin.
Shop this idea:
8. Clear Matte With Scattered Holographic Dots
Style: Edgy Minimal | Budget: Under $18 | Best For: Matte lovers


Matte clear plus holo dots is unexpectedly chic. Apply matte topcoat over clear polish, then dot holographic micro-dots and seal with another matte layer or leave dots glossy for contrast. I prefer leaving dots glossy for texture. Ugly truth, matte topcoats can dull shimmer if over-applied.
Shop this idea:
9. Transparent Nail Stickers With Embedded Glitter
Style: Fast Fix | Budget: Under $15 | Best For: Busy people


Transparent stickers with embedded glitter are my go-to for same-day sparkle. Peel, press, and file; no dry time. I keep a packet in my purse for last-minute events. Heads up, cheap stickers can lift at the edges, so look for brands that advertise full-coverage adhesive for $6 to $12.
Shop this idea:
10. Clear Coat With Multichrome Shimmer
Style: Statement Subtle | Budget: Under $22 | Best For: Statement lovers


A clear topcoat with multichrome shimmer gives a shifting flash that reads high-end. Apply over any sheer base to transform a simple mani. I found a bottle for $12 to $20 that made my cheap polish look custom. Note, multichrome powders need thin layers to avoid clumping.
Shop this idea:
11. Barely-There Clear With Silver Leaf Accent
Style: Architectural | Budget: Under $25 | Best For: Cool modern wardrobes


Silver leaf placed against a sheer base reads unexpected and tailored. I like a single accent nail covered partially in leaf for balance. Pro tip, use tweezers and a tiny brush to smooth edges before topcoat. I once ruined a sweater because I didn’t seal the edges well; don’t skip sealing.
Shop this idea:
12. Transparent Milky Base With Micro-Glitter Cuticle Crescents
Style: Refined | Budget: Under $18 | Best For: Short to medium lengths
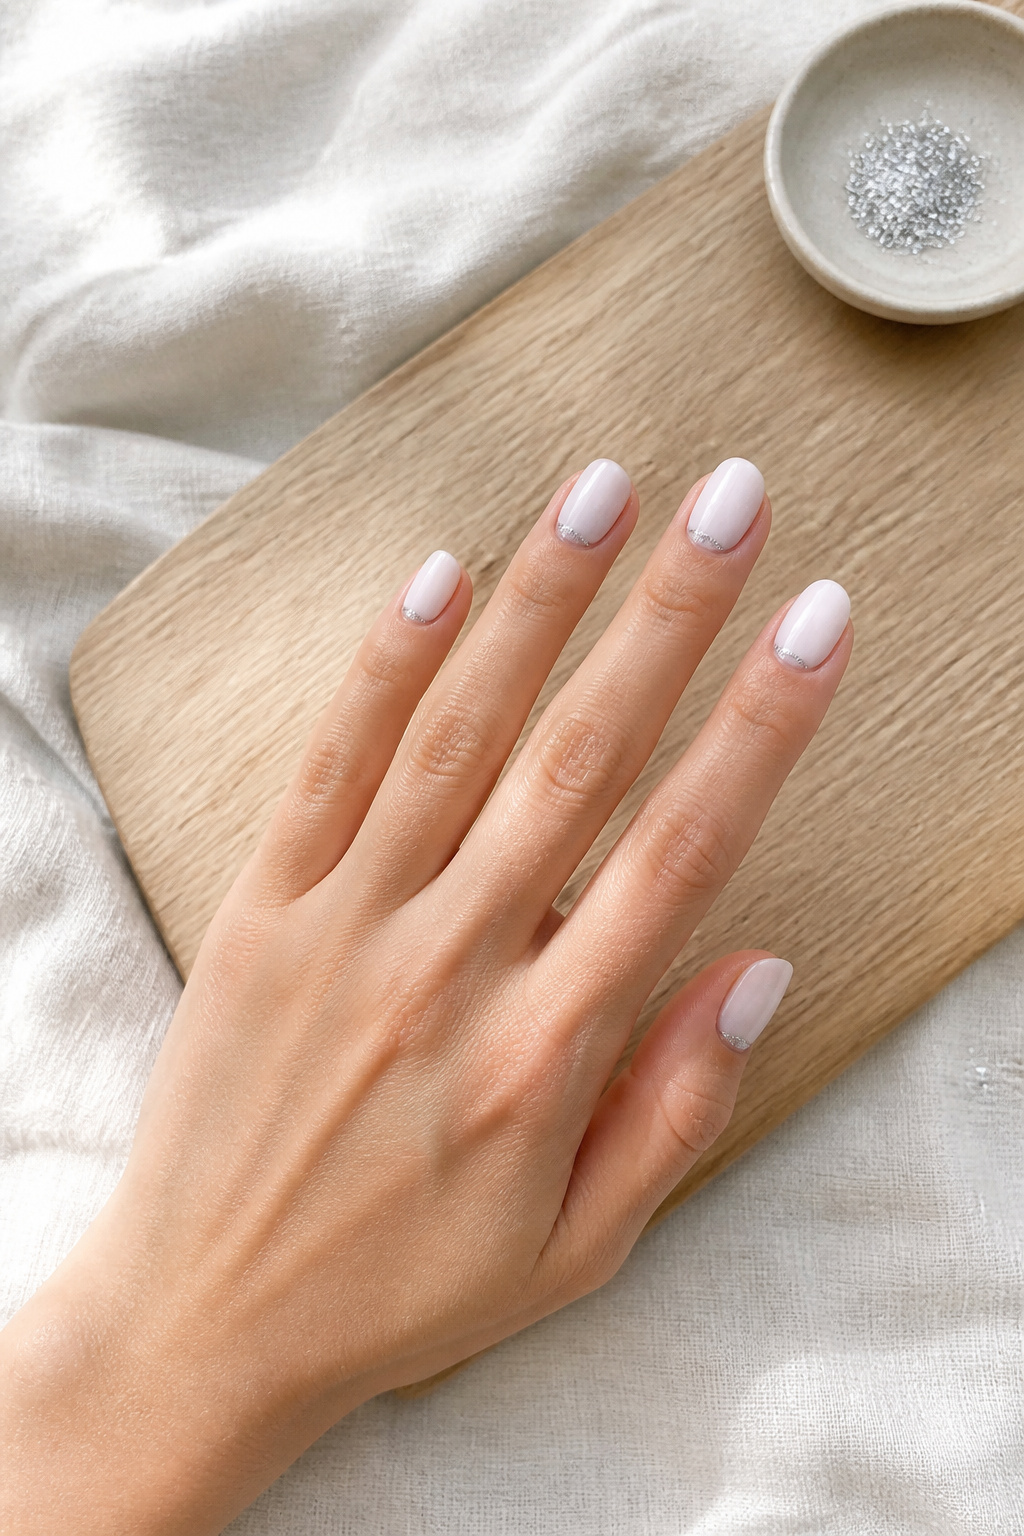

Tiny glitter crescents at the cuticle create a modern inverted French. Paint a milky base, then use a dotting tool for the crescent placement. I get salon polish looks at home for $8 to $15 with this method. Beware overloading glitter near the skin; it can flake off if not sealed.
Shop this idea:
13. High-Gloss Clear With Rainbow Flakes
Style: Youthful | Budget: Under $20 | Best For: Festival looks


Rainbow flakes in a glassy clear coat take a basic mani to festival ready. Press flakes into wet clear polish, then cure under lamp or wait to dry fully before sealing. I picked up a multi-flake mix for $10 to $15 and used it for a concert; it lasted one wild night without losing glow.
Shop this idea:
14. Transparent Almond Shape With Silver Micro-Glitter
Style: Classic Modern | Budget: Under $25 | Best For: Long nail wearers
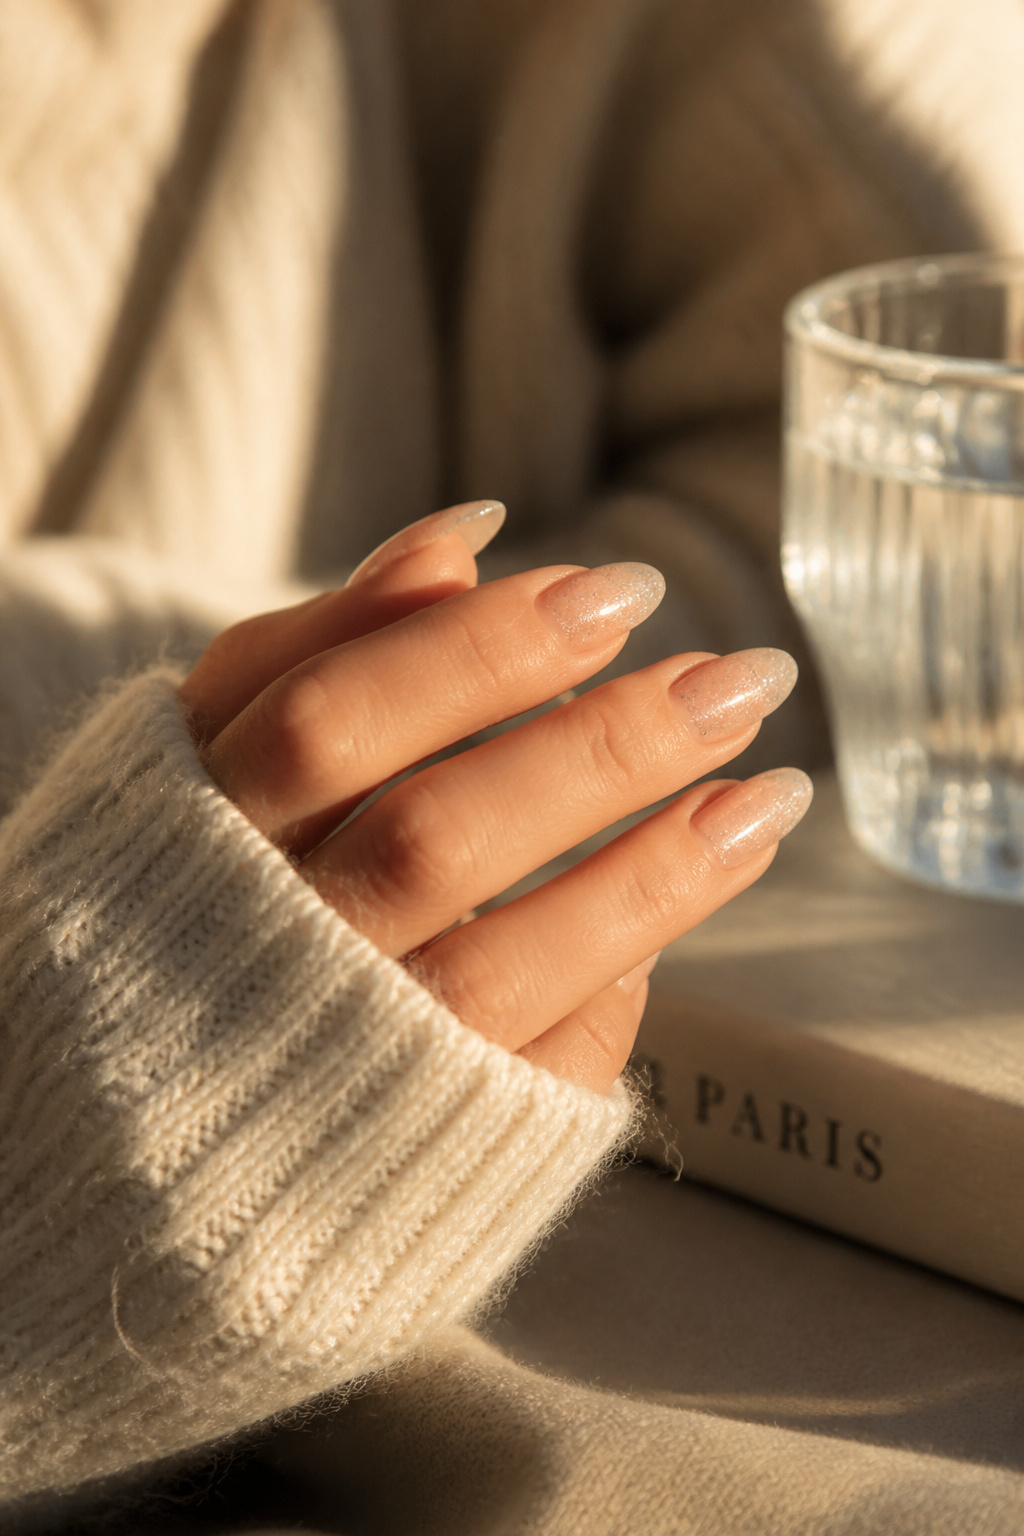

An almond shape with fine silver glitter embedded in clear polish reads chic and elongating. I filed to almond and applied thin layers of glitter for depth. Real talk, longer nails demand more upkeep; I invested about $12 in strengthening base to avoid breakage. Also, chunky glitter ruins the silhouette, choose micro sizes.
Shop this idea:
15. Clear Base With Subtle Holographic Stripe
Style: Sporty Chic | Budget: Under $16 | Best For: Active lifestyles


A center holographic stripe reads modern and stays practical for active hands. Use a striping tape guide before painting. I wore this on a hiking trip and it scuffed less than colored polish. Pricewise, a striping tape roll and holo polish set was $10 to $18 and lasted through three activities.
Shop this idea:
16. Subtle Rainbow Sheen Over Clear Gel
Style: Luxe Subtle | Budget: $25 to $50 | Best For: Special occasions
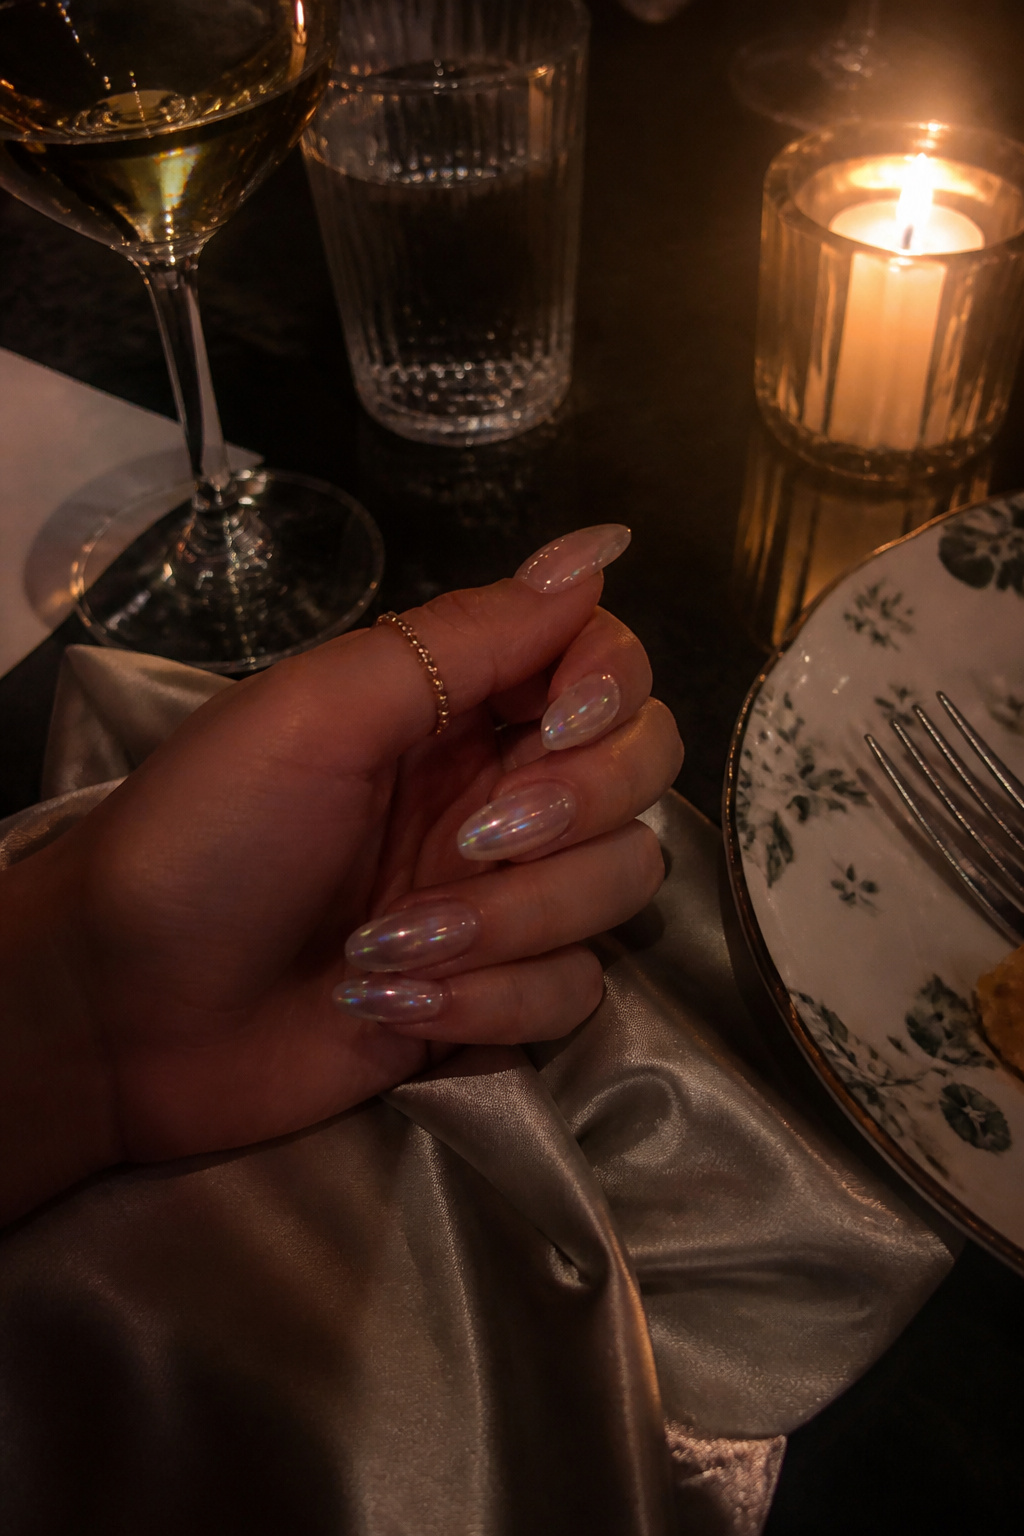

A rainbow sheen over clear gel is quietly showy in dim light. This one benefits from gel for mirror-like depth. I spent around $35 at a salon once and it lasted two weeks without lift. Ugly truth, DIY gel without tool knowledge can bubble or cure unevenly.
Shop this idea:
17. Clear With Champagne Glitter Gradient
Style: Evening Glam | Budget: Under $22 | Best For: Formal events
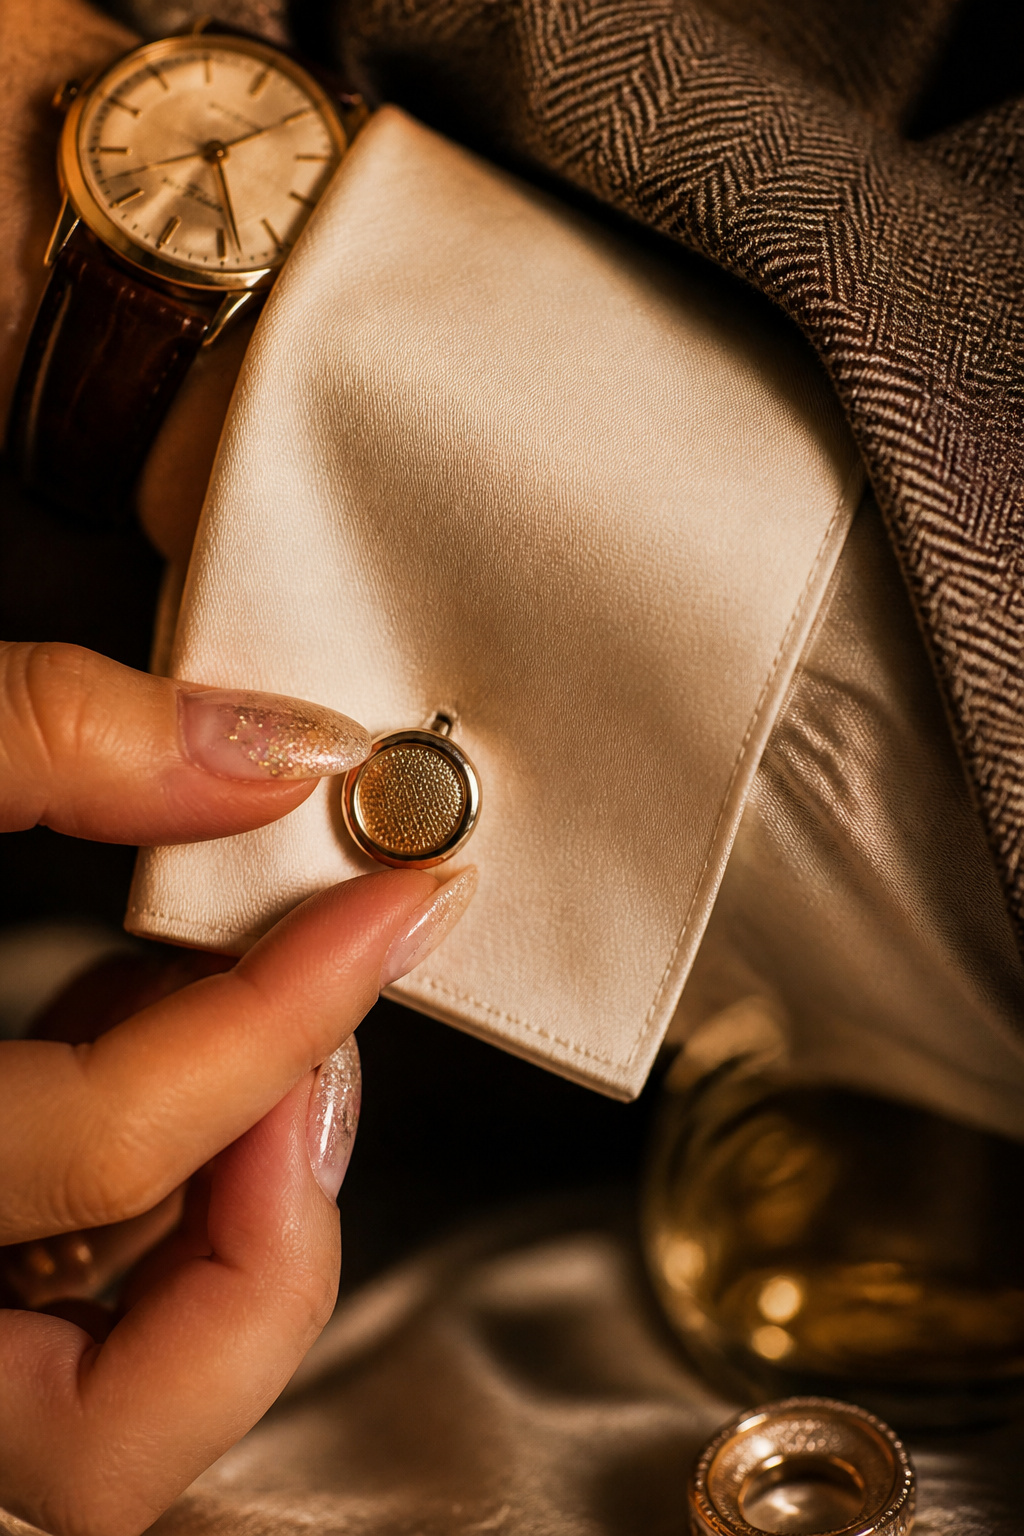

Champagne glitter gradation is my quick hack for evening polish that photographs well. Start dense at the tip and feather toward the base with a sponge. I used a champagne glitter for $9 to $16 and skipped full nail color for the night. The only downside is removal can be a bit abrasive if glitter is dense.
Shop this idea:
18. Transparent Satin Finish With Micro-Gold Dust
Style: Elevated Minimal | Budget: Under $20 | Best For: Capsule wardrobes


Satin clear polish plus micro-gold dust gives a soft reflective glow without mirror shine. Apply satin topcoat, then press tiny gold dust near the base and seal lightly. I love this for days I want texture over gloss. Note, satin topcoats mute overly bright glitter, so choose micro-gold for subtlety.
Shop this idea:
19. Transparent Almond Press-Ons With Embedded Glitter
Style: Fast Luxe | Budget: Under $25 | Best For: Non-committal testers


If I want instant glamour I reach for transparent almond press-ons with embedded glitter. They affix in minutes and look salon-made when you file the edges. I keep a set for travel; they cost $12 to $22 and saved me at a last-minute party. Ugly truth, cheap glue can lift, so use double-sided tabs for short-term wear.
Shop this idea:
20. Clear With Tiny Star Glitter Accent
Style: Romantic Playful | Budget: Under $18 | Best For: Delicate detailing


Tiny star-shaped glitters on a clear base feel whimsical without being childish. I place one star on an accent nail and keep the rest simple. A jar of star glitters was $5 to $10 and I use them for seasonal looks. Practical tip, larger shapes need extra topcoat layers to smooth the surface.
Shop this idea:
What You'll Need to Get This Look
Face & Base Essentials
- Nail strengthening base coat around $6 to $15
- Sheer neutral base polish 10ml around $6 to $14
- High-gloss top coat quick dry around $8 to $20
- Matte top coat clear around $7 to $18
Eyes, Brows & Lips
- Mini nail file set around $4 to $12
- Cuticle pusher stainless steel around $5 to $12
- Gentle glitter remover pads around $6 to $14
Clothing Staples
- Cashmere crewneck sweater cream approx $60 to $120
- Silk scarf neutral print approx $18 to $40
Shoes, Bags & Jewelry
- Gold chunky hoop earrings 14k look around $12 to $30
- Leather tote bag tan around $50 to $150
Budget Swaps
- Press-on almond clear glitter set $12 to $22 (swap for salon gel)
- Iridescent nail flakes jar $6 to $12 (dupe for luxury micro-flakes)
- Gel-effect top coat clear $8 to $20 (dupe for gel shine)
Shopping Tips for These Looks
Buy seasonal glitter in late summer: Many sellers discount holiday glitters by 20% to 40% in August to clear inventory, so stock up early and store in a dry box. See rainbow nail flakes mix for bundles.
Look for micro sizes, not chunky: Micro-glitters layer nicer and don't snag on knits, which I learned the hard way. Try micro-glitter silver jar.
Thrift your tools: High-quality manicure tools show up at thrift stores and estate sales, so check local shops before splurging. For a quick buy, precision tweezers manicure is under $10.
Time your gel sessions around events: Gel holds better when applied to healthy nails, so schedule a strengthening treatment a week before major events. Consider nail strengthening base coat.
Mix thrifted jewelry with clear nails: Transparent glitter pairs well with vintage gold; thrift a signet ring and pair with gold micro specks nail jar for elevated results.
Follow 2025 shimmer trends: Soft, transparent sheens and micro-glitters are appearing across runways in 2025 trend roundups, so prioritize subtle, layered textures like multichrome shimmer top coat.
Frequently Asked Questions
Q: How long do transparent glitter manicures typically last?
A: With regular polish expect 5 to 7 days, gel can last 2 weeks. For longer wear try a builder gel clear 15ml and keep cuticles clean.
Q: Can I get salon-quality clear glitter at home?
A: Yes, with a good base, thin layers, and a glossy top coat you can. Invest in a compact LED nail lamp if you use gels.
Q: Which glitter types are easiest to remove?
A: Fine micro-glitter dissolves faster than chunks. Use gentle glitter remover pads and soak rather than scraping.
Q: Are transparent glitter nails suitable for mature hands?
A: Absolutely, sheer bases and small glitter accents brighten skin tone without drawing attention to veins. Try a sheer neutral base polish 10ml for subtlety.
Conclusion
Start with a tiny accent, like a single glitter tip, and build from there. If you’re unsure, try press-ons or micro-glitter jars under $12 to test the look. Which transparent glitter style will you try first, a holo tip or a champagne gradient?


