








My chipped salon set was embarrassing and expensive. White ombre nails with glitter saved me, and I rebuilt my go-to looks into 13 wearable versions that actually last. I spent mostly under $30 per mani at home, with two splurges near $80 for pro tools. These are for brides, clean-girl fans, and anyone who loves a little sparkle without looking glued-on.
I lean clean, tonal, and slightly elevated. Most ideas under $30, a couple around $80 for an LED lamp or builder gel. Perfect for short nails, brides, soft-glam lovers, and anyone who likes a wearable sparkle. I’ve noticed glitter accents and micro-flakes getting pinned a lot on Pinterest and nail pros doubling down on milky ombre finishes for 2025.
1. Sheer Milky Ombre With Fine Silver Glitter
Style: Clean Girl | Budget: Under $25 | Best For: Pale to medium skin tones


The trick is a thinned white gel for that milky fade, then a whisper of silver micro-glitter on the apex. I use a 15ml white gel polish layered sheer, around $6 to $12 per bottle, and dab micro-glitter sparingly for light-catching. Tip: buff lightly between thin coats to avoid a gummy finish. I once over-layered glitter and it looked chunky; lesson learned fast when my friend called it “snowball nails.”
Shop this idea:
2. Pearl Fade With Iridescent Flakes
Style: Bridal Soft Glam | Budget: Under $30 | Best For: Warm and neutral undertones


I love pearl flakes over a soft white fade for weddings. Use an opalescent flake topper, applied with a small brush while the topcoat is tacky. Product pick: opal nail flakes jar, approx $8 to $18. Practical tip: press flakes flat with a silicone tool then seal with two thin topcoats. I ruined a mani once by skipping the second seal and flakes lifted by day three.
Shop this idea:
3. Frosted French Ombre With Holo Glitter
Style: Modern French | Budget: Under $35 | Best For: Short nails, office-friendly


Frosted white ombre keeps French vibes but catches light like crazy with holo glitter only on the tips. I use a holographic topcoat sparingly, around $10 to $20. Tip: sheer matte topcoat over holographic for a soft shimmer that still reflects. Ugly truth: full-coverage holo is Instagram-only; tiny tipped sparkle reads polished in person and at meetings.
Shop this idea:
4. Chunky Gold Flake White Ombre
Style: Statement Minimal | Budget: Under $30 | Best For: Evening, warm skin tones
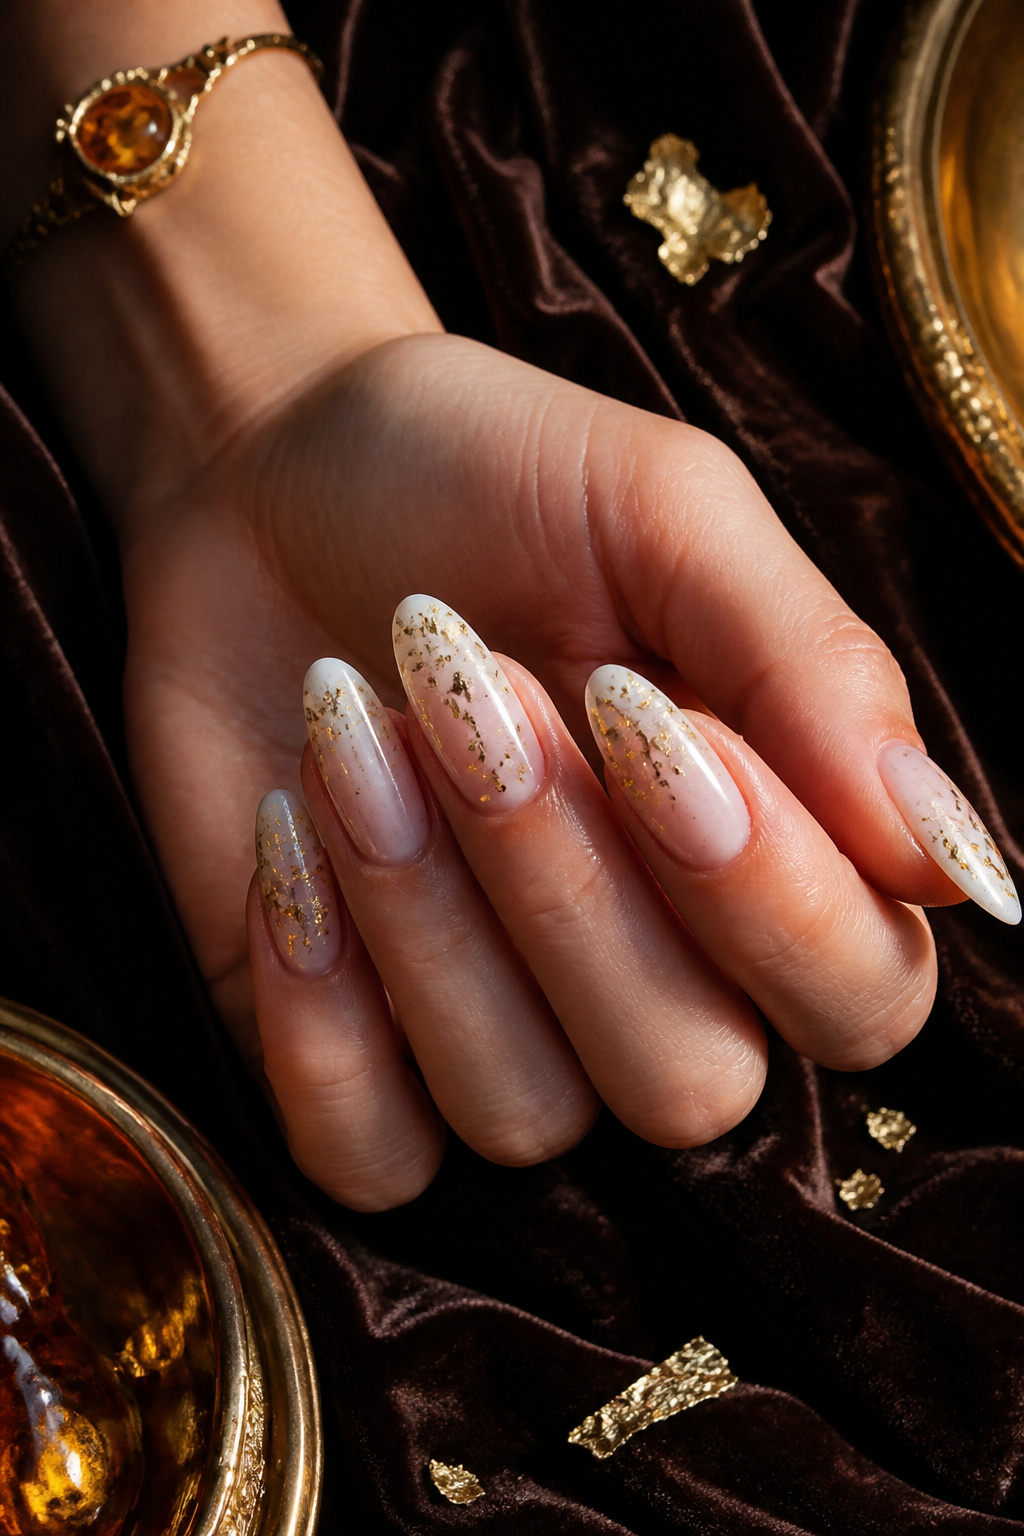

Chunky gold flakes elevate a basic milky fade for nights out. I press 1–2 flakes near the cuticle on two accent nails and seal with builder gel; gold flakes jar is about $7 to $15. Practical tip: less is more, otherwise it reads costumey. I learned this at a holiday party where my nails outshone my dress, and not everyone loved that.
Shop this idea:
5. Negative Space Crescent With Silver Glitter
Style: Minimal Edge | Budget: Under $20 | Best For: Short nails, capsule wardrobes
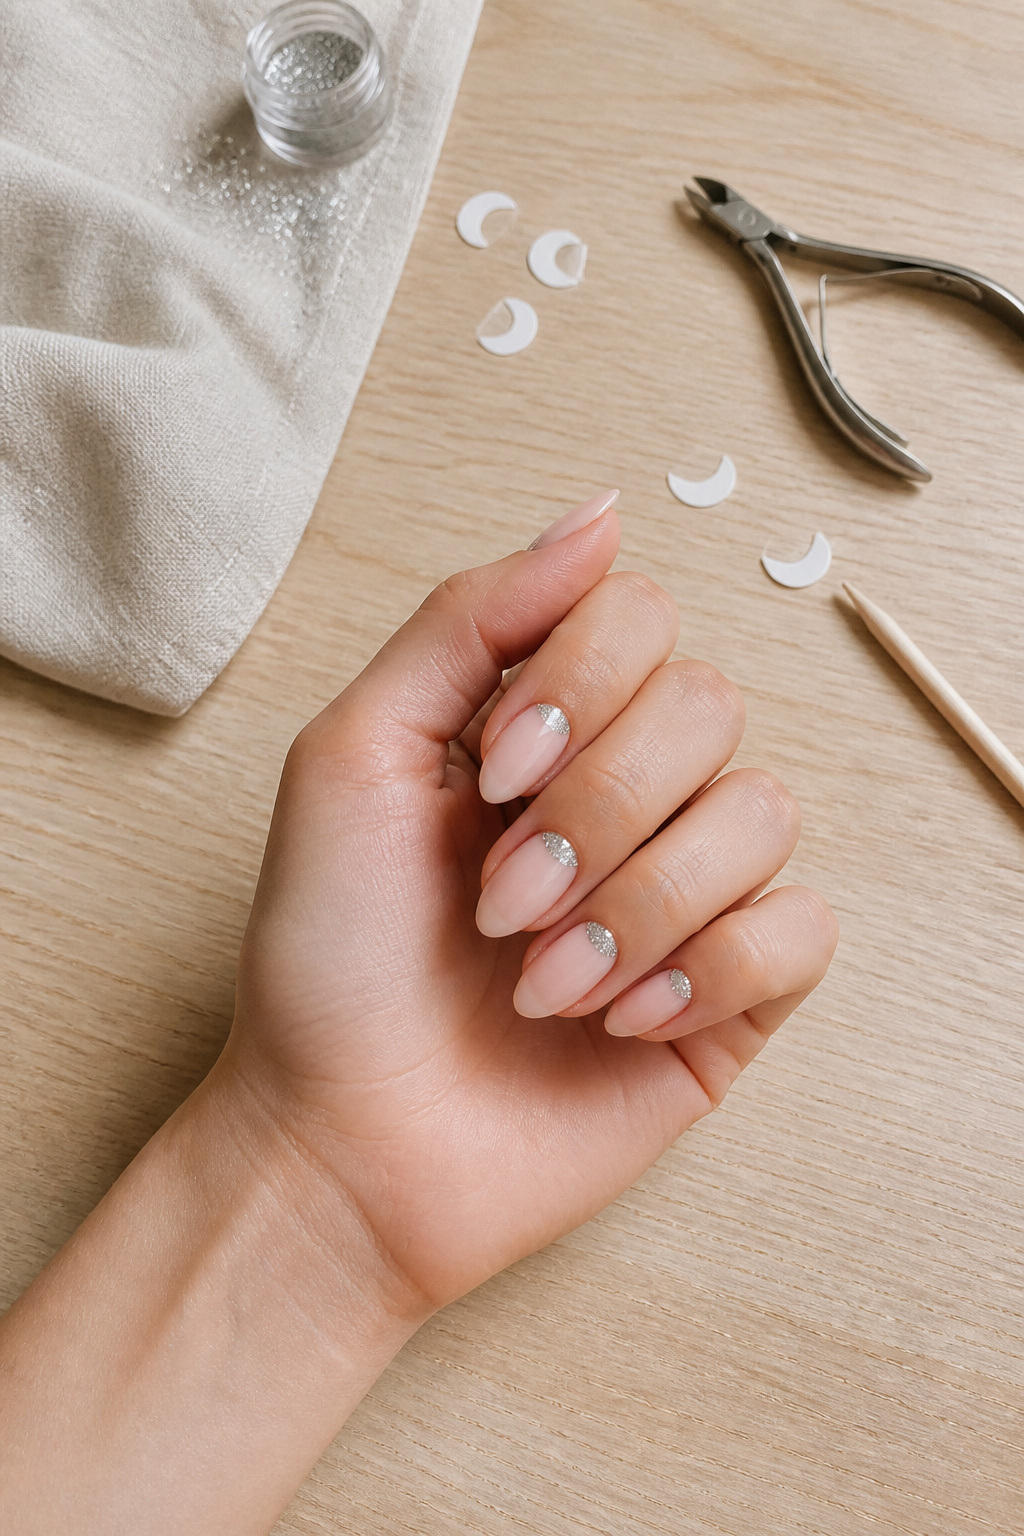

Negative space crescent keeps a modern shape while glitter adds drama only where needed. I use peel-off guides and a superfine silver glitter, around $5 to $12. Tip: place glitter in the cured gel tack layer to trap it perfectly. Ugly truth: attempting freehand crescents without guides looks amateur; buy the cheap stickers.
Shop this idea:
6. Matte White Ombre With Glitter Accent Nail
Style: Soft-Grunge Clean | Budget: Under $25 | Best For: Trendy, texture lovers


Matte finish makes the glitter pop. Use a matte topcoat for all nails and a glossy high-shine for the glittered accent. Product: matte topcoat, approx $6 to $14. Tip: apply matte topcoat first, then freshly apply glitter and seal with glossy topcoat only on that nail. I tried full-matte glitter once and it dulled the sparkle—don’t do that.
Shop this idea:
7. Baby-Boomer White Ombre With Micro-Glitter
Style: Classic Bridal | Budget: Under $30 | Best For: Long nails, brides


Baby-boomer ombre needs a tiny sweep of micro-glitter along the smile line for dimension. I use a soft pink base and a milky white tip, then a superfine gold-silver micro-glitter, about $9 to $18. Tip: gradient with a square sponge for smooth blending. Ugly truth: heavy sanding kills the soft fade; be gentle with buffing.
Shop this idea:
8. Champagne Ombre With Reflective Flakes
Style: Luxe Night Out | Budget: Under $35 | Best For: Medium to deep skin tones
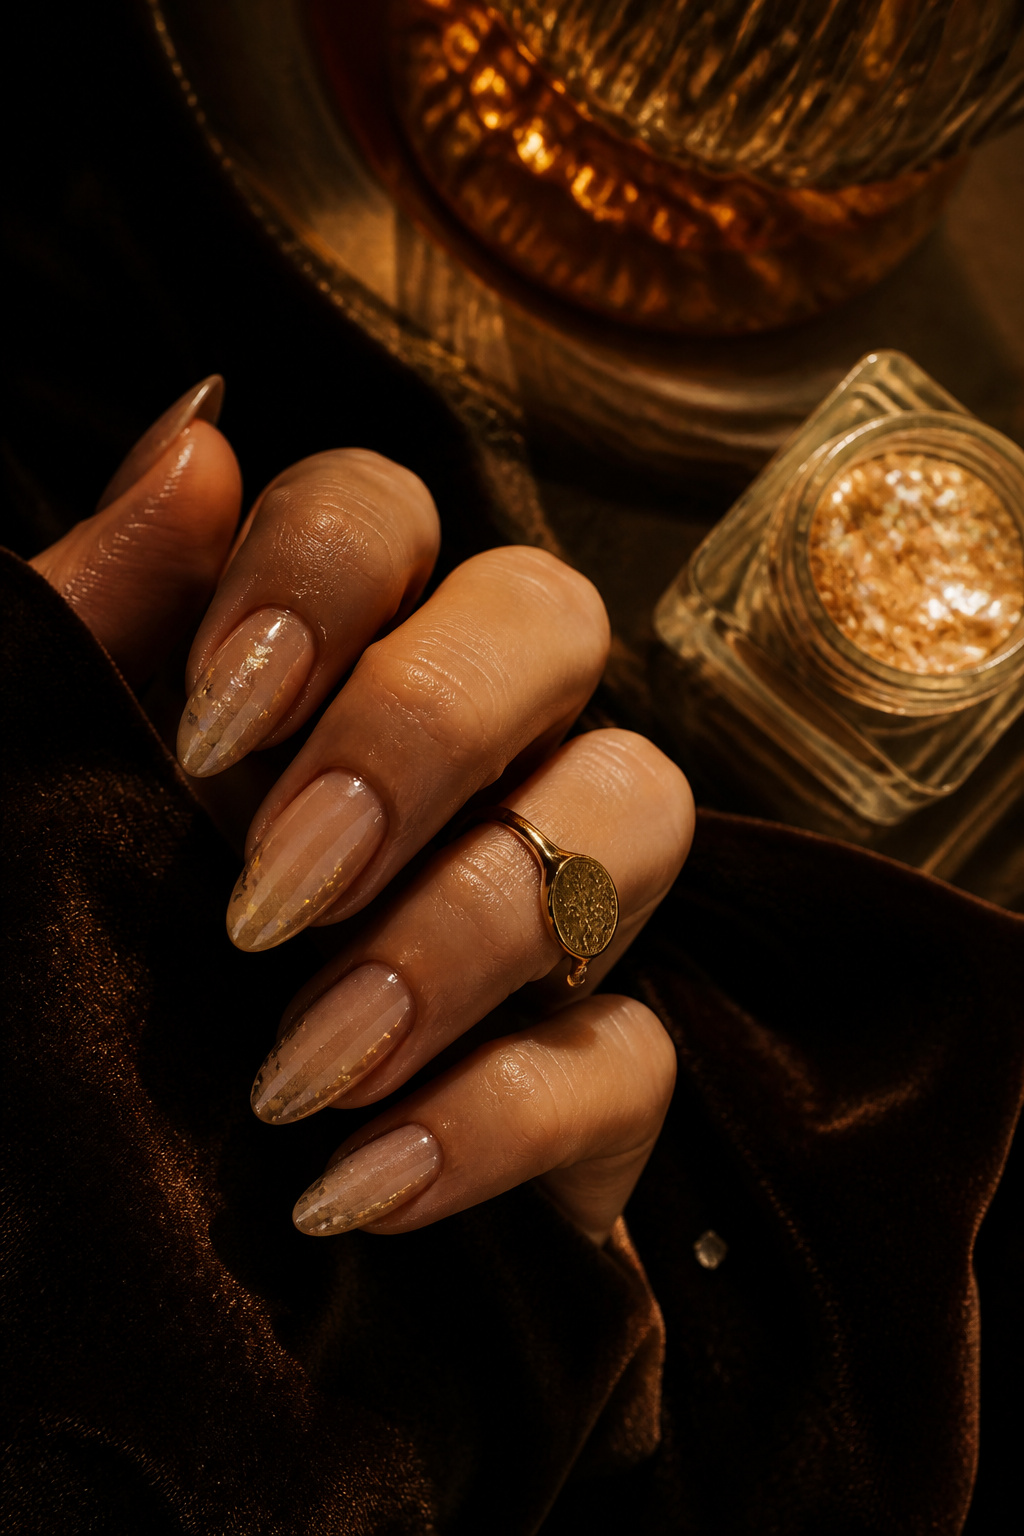

Champagne-toned white ombre looks rich on deeper skin when paired with reflective glass flakes. I apply flakes sparingly near the tip, reflective flake pot approx $10 to $20. Practical tip: use a tacky base layer to keep flakes from floating. I once soaked my hands in water right after curing and lost two flakes—patience matters.
Shop this idea:
9. Iridescent Opal Ombre With Tiny Glitter
Style: Ethereal | Budget: Under $25 | Best For: Cool undertones, delicate looks
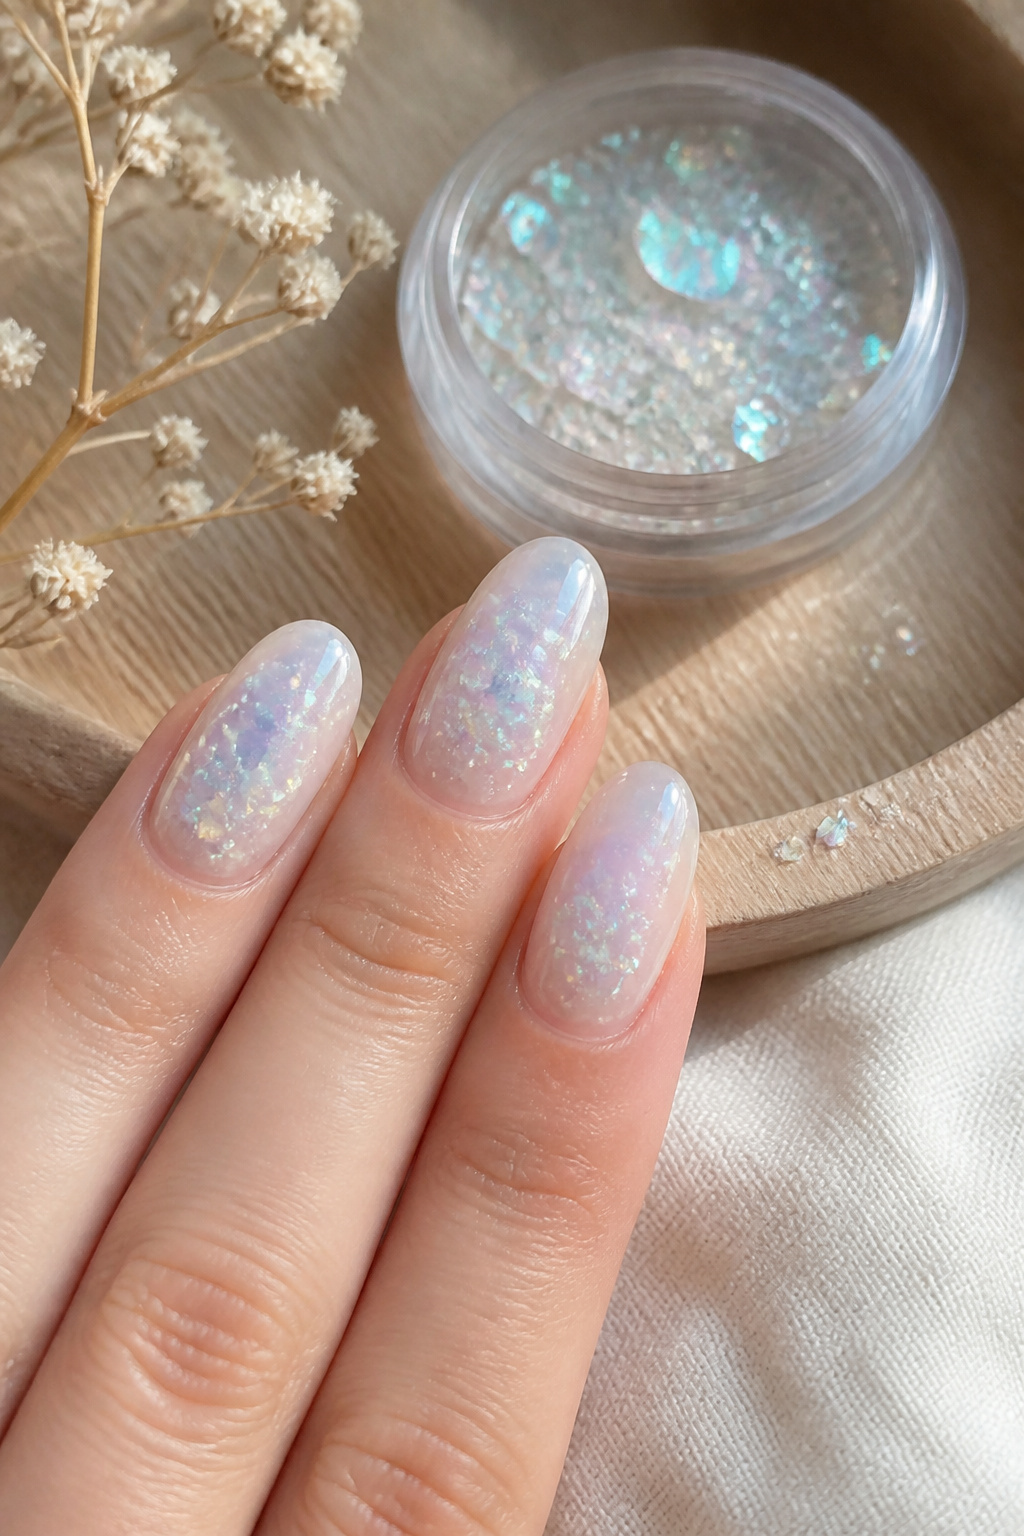

Opal iridescence over a soft white fade is quiet but reflective. I layer an iridescent flake polish thinly and add superfine glitter on the free edge; iridescent topper approx $9 to $16. Tip: the thinner the layer, the less peeling later. I tried a heavy iridescent gel once and it chiseled after a week—thin layers save your mani.
Shop this idea:
10. Soft Pink-To-White Ombre With Rose Gold Glitter
Style: Romantic | Budget: Under $30 | Best For: Cool to neutral undertones


A soft pink base graduating to white, with rose gold glitter near the cuticle, reads modern and feminine. I use rose-gold micro-glitter, about $7 to $14. Practical tip: pick a warm pink base for the rose-gold to read cohesive. Honest note: I thought cooler pinks would work and the glitter looked cold; match undertones.
Shop this idea:
11. Iridescent Chrome White Ombre With Mirror Glitter
Style: Futuristic Clean | Budget: Under $40 | Best For: Short to medium nails


Chrome powder over a white ombre, then mirror glitter accents, equals high-reflect shine. Chrome powder small jar approx $10 to $22. Tip: apply chrome over a no-wipe topcoat for the smoothest mirror effect. Ugly truth: chrome shows every ridge, so prep your nail surface meticulously.
Shop this idea:
12. Opal Cuticle Glitter With Soft White Fade
Style: Subtle Luxe | Budget: Under $20 | Best For: Minimalists, short nails


Placing opal or iridescent glitter at the cuticle gives a luxe hint without overwhelming. I apply a single dot of opal flake to the lunula area, opal pot about $6 to $14. Tip: keep the rest of the nail very sheer so the cuticle sparkle reads intentional. I once filled the whole nail with flakes and it read costume; restraint wins.
Shop this idea:
13. Gradient Glitter Fade From Cuticle To Tip
Style: Glam Gradient | Budget: Under $30 | Best For: Party looks, long nails


A gradient glitter fade makes nails flash with movement. Start with dense glitter at the cuticle and brush outward, using a superfine clear glitter for a smooth dissolve; glitter mix approx $9 to $18. Tip: use a small fan brush to scatter particles for a natural fade. Personal fail: I patted too hard once and created glitter islands instead of a gradient—gentle strokes only.
Shop this idea:
What You'll Need to Get This Look
Face & Base Essentials
- Base coat nail gel around $8 to $18
- Milky white gel polish 15ml around $6 to $14
- No-wipe topcoat 15ml around $8 to $20
- Builder gel 15ml around $12 to $30
Eyes, Brows & Lips
- Cuticle oil pen 5ml around $4 to $12
- Nail buffer block around $3 to $8
Clothing Staples
- Silk scarf cream around $12 to $40
- Cashmere crewneck sweater approx $60 to $120
Shoes, Bags & Jewelry
- Gold hoop earrings medium around $10 to $35
- Pearl signet ring around $12 to $45
Budget Swaps
- Drugstore white polish around $3 to $8
- Glitter sample pack around $5 to $12
Shopping Tips for These Looks
Buy Small Jars: Start with sample-size glitter packs to test scale, like a $5 to $12 sampler from Amazon Glitter sample pack.
Seasonal Sales: Score LED lamps and builder gels during Prime Day or Ulta 21 Days of Beauty, these events cut splurge tools by 20% to 40%. See LED lamp deals LED nail lamp.
Thrift + New: Pair thrifted silk scarves with new minimalist jewelry for shoot-ready shots. I found a €6 scarf at a flea market that made a $30 mani read editorial. Try a simple gold hoop Gold hoop earrings medium.
2025 Trend Hack: Micro-flake mixes and negative space crescents are trending, so buy a micro-flake set early for seasonal pins Superfine micro glitter pot.
Timing Tip: Paint nails at night and sleep with gloves over cuticle oil for hydrated lunulas in the morning. A cuticle oil pen helps Cuticle oil pen 5ml.
Frequently Asked Questions
Q: How long do white ombre nails with glitter last at home?
A: With proper base, thin layers, and a good topcoat you can expect 10 to 14 days. Use a no-wipe topcoat and builder gel for longer wear, like a builder gel kit Builder gel 15ml. Tip: avoid hot baths first 24 hours.
Q: Can I do these looks on short nails?
A: Yes, many ideas here are designed for short nails; negative space crescents and cuticle glitter work best. Try a milky white polish for shallow fades Milky white gel polish 15ml.
Q: Is glitter safe for natural nails?
A: Glitter itself is fine if sealed properly. Use a no-wipe topcoat and thin layers to prevent lifting, like this no-wipe topcoat No-wipe topcoat 15ml. Extra tip: remove with oil soak, not force.
Q: Which tool upgrades are worth splurging on?
A: A reliable LED lamp and a quality builder gel are worth the spend; they reduce chipping and improve finish. LED lamp kits are often $30 to $80 LED nail lamp.
Conclusion
Start with a soft milky fade and one glittered accent; it’s the fastest way to look polished without drama. If you’re indecisive, pick the negative-space crescent or cuticle glitter first. Which sparkle level do you want—subtle glint or full-on flash? Tell me and I’ll recommend the exact products I’d use.


